
How to Build Deck Stair Railing the Right Way?
A solid deck stair railing is one of those things you do not think about until it is missing and then it is all you can think about. Whether you are finishing a new deck build or upgrading an older one, adding a properly built stair railing makes your outdoor space safer, more comfortable, and up to code. In British Columbia, it is also a legal requirement for any deck 30 inches or more above the ground.
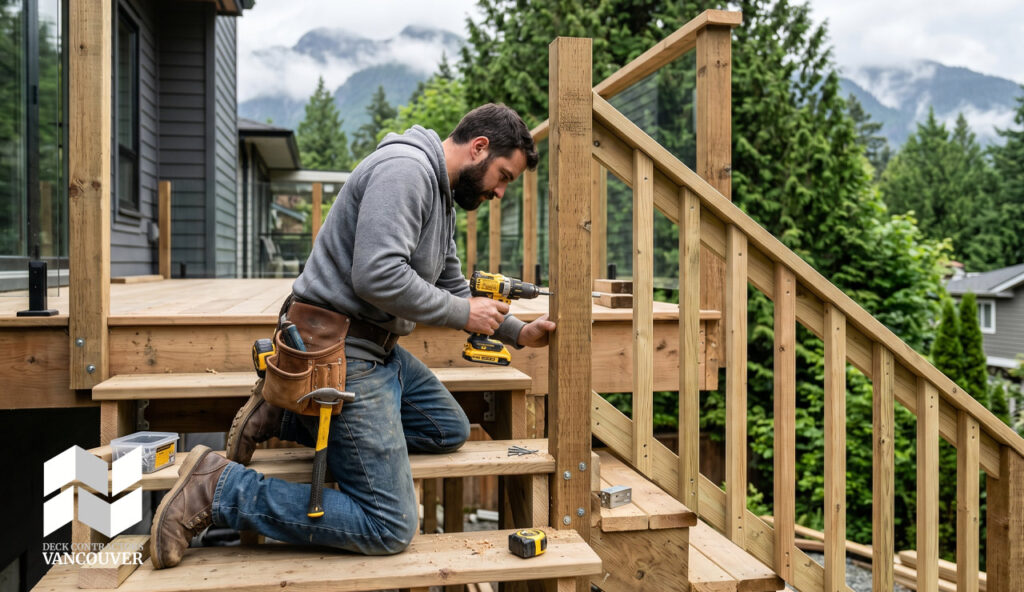
This guide walks you through everything you need to know to build a deck stair railing with confidence — from choosing the right materials and understanding local code requirements, to cutting the rail angle correctly and spacing your balusters to pass inspection. If you are based in the Vancouver area and want the job done by an experienced local crew, Deck Contractors Vancouver is here to help.
What Is a Deck Stair Railing and Why It Matters
A deck stair railing is the guardrail system installed along the angled steps that lead up or down from your deck. Unlike a standard flat deck railing, which runs perfectly level along the perimeter of the platform, a stair railing must follow the pitch of the stairs typically somewhere between 32 and 37 degrees. That angle changes everything: the posts, rails, balusters, and hardware all need to be cut and fitted to match that slope while still keeping the structure solid and gap-free. It sounds simple, but getting that angle right is where most DIY builds run into trouble.
In British Columbia, a stair railing is required by code any time your deck is 30 inches or more above the ground. But beyond the legal requirement, a properly built railing is one of those things that quietly earns its keep every single day. It gives kids something to hold on to, helps older family members feel steady on the way down, and keeps everyone safer when the steps are wet or icy which in the Vancouver area is not exactly a rare situation. And from a home value standpoint, a railing that looks solid and finished tells buyers and inspectors alike that the whole deck was built with care.
Building Codes for Deck Stair Railings in BC and Canada
The minimum height for a deck stair railing in British Columbia is 34 inches, measured vertically from the nose of the stair tread not from the top of the step surface, and not from the ground. That distinction matters more than most people expect, because measuring from the wrong point can leave you with a railing that looks tall enough but fails inspection. Some municipalities in Metro Vancouver require 36 or even 42 inches depending on the height of the deck, so checking with your local building department before you cut a single post is always the right first move.
Baluster spacing is the other number that gets people into trouble. The rule in Canada is straightforward: the gap between any two balusters must be small enough that a 4-inch sphere cannot pass through. On a flat deck section that is easy to visualize, but on a stair railing the angle of the rail means the spacing between balusters shifts slightly as you move up or down the run. You also need to account for the bottom rail clearance, where a 6-inch sphere should not be able to pass through the opening between the stair tread and the underside of the lower rail. Both rules exist for the same reason: to prevent a small child from slipping through or getting stuck.
Pulling a permit before you build is not just a formality in the Vancouver area it is the step that protects you when it matters most. A permitted deck and stair railing has been reviewed against the BC Building Code and signed off by an inspector, which means you have documentation that the structure is safe and up to standard. That matters for insurance, for resale, and for your own peace of mind. Post spacing must generally stay under 6 feet on center, and all posts must be properly anchored to the stair stringers with structural hardware rated for pressure-treated lumber. If any of that is unclear before you start, a local deck contractor can walk you through what your specific project requires.
Tools and Materials You Will Need
Before you start, gather your lumber and hardware. For a standard wood stair railing you will need 4×4 pressure-treated posts, 2×4 rails for the top and bottom, 2×2 balusters, and a 2×6 board for the rail cap. On the hardware side, pick up galvanized carriage bolts, washers, nuts, post anchors, and deck screw all rated for pressure-treated lumber, since standard hardware will corrode quickly when it contacts treated wood.
For tools, you will need a circular saw, a miter saw for angled cuts, a drill and driver, a speed square or angle finder, a level, and a tape measure. Nothing on this list is exotic, but having everything on hand before you start saves a lot of back-and-forth trips to the hardware store. If you are in the Vancouver area, most of this material is available at any major building supply in pressure-treated grades suited for the wet West Coast climate.
How to Build Deck Stair Railing Step by Step
Building a deck stair railing is a straightforward process when you work through it in the right order. The key is not rushing the early steps a post that is not plumb or an angle that is off by a few degrees will create problems that compound all the way to the rail cap. Here is the basic sequence for a standard wood stair railing using pressure-treated lumber.
- Install and plumb the bottom post, securing it to the outside of the stair stringers with threaded rods, washers, and nuts. Use a level to confirm the post is perfectly plumb before tightening everything down.
- Determine the rail angle by placing a 2×4 across the stair treads and using a speed square or angle finder where it meets the post. Most deck stairs fall between 32 and 37 degrees.
- Cut the top and bottom rails to length at the correct angle and attach them to both posts with 3-inch deck screws, two per connection point.
- Install the balusters at consistent spacing, checking each one for plumb with a level. Finish by cutting the 2×6 rail cap to length and screwing it down over the top rail.
Take your time with the angle cuts this is where most first-time builders lose material to mistakes. If your miter saw is set correctly and your reference marks are clean, the rest of the build comes together quickly and the finished railing will look like it was done by a pro.
Cutting the Rail Angle Correctly
Getting the rail angle right starts with a good reading from your stairs. Place a straight 2×4 across the stair treads and hold it against both posts. Where that board intersects the post is your angle reference point — mark it clearly with a pencil on the front and back of each post. From there, use a speed square or T-bevel to capture the exact angle and transfer it directly to your saw. Do not rely on estimates or standard angles from a chart, because stair pitch varies from one build to the next.
Once your reference marks are on both the upper and lower posts, use a circular saw to make the angled cut at the top of each post. Set the saw to the angle you captured with your T-bevel and cut slowly you only get one shot at each post. The goal is a clean, flat surface that sits flush against the underside of the rail cap once everything is assembled.
The most common mistake at this stage is measuring once and cutting immediately. A small error in the angle reading gets amplified across the full width of the post, leaving a gap that is hard to hide and impossible to ignore. Mark your angle, double-check it against the stair pitch one more time, and make a test cut on scrap lumber before touching your actual post. That extra five minutes saves a trip back to the lumber yard.
Installing Balusters on Stair Railings
Installing balusters on a stair railing is a bit more involved than on a flat deck section. Because the rails are angled, each baluster sits at a slightly different height along the run, which means you cannot simply cut them all to the same length and expect a clean result. You need to measure each one individually — or use the first baluster as a template and adjust as you go — to make sure every piece sits flush against both rails without rocking or twisting.
Start by finding the center point between your two posts and work outward in both directions. Mark your baluster positions on both the top and bottom rails at consistent intervals, keeping the gap under 4 inches to meet code. Once your layout is marked, cut the top of each baluster at the same angle as the rail so the fit is tight and there are no visible gaps where the baluster meets the rail above.
Before fastening, drill pilot holes at both ends of each baluster to prevent the wood from splitting. Drive two deck screws per end — one from each face — and check every baluster for plumb with a level before moving to the next one. It takes a little longer than just screwing them in place, but a plumb, evenly spaced baluster line is what separates a railing that looks professional from one that looks rushed.
How to Build Deck Stair Railing with Different Materials
Pressure-treated pine is the most common choice for deck stair railings in the Vancouver area because it is affordable, widely available, and holds up well when properly maintained. Cedar is a step up in terms of appearance and natural rot resistance, and it takes stain beautifully if you want a warmer, more finished look. Both wood options require periodic sealing or staining to stay in good shape through BC winters. Composite railing is worth considering if you want to skip that maintenance routine — most composite systems come in stair kits with pre-angled brackets and pre-cut components that simplify the installation considerably.
For a more modern look, aluminum railing is an excellent fit for Metro Vancouver builds, particularly near the water where moisture and salt air accelerate corrosion on other materials. It is rust-resistant, low-maintenance, and available in clean profiles that suit contemporary homes well. Cable and glass railings sit at the premium end of the spectrum and are especially popular on decks with a view worth preserving. Both options come with higher material and installation costs, and cable systems in particular require posts with enough structural strength to handle the lateral tension from the cables — something to plan for from the start rather than retrofit later.
Common Mistakes to Avoid When Building Stair Railings
Even experienced builders make avoidable errors on stair railings. The angled installation adds a layer of complexity that flat deck sections do not have, and small oversights early in the build tend to show up clearly in the finished product. These are the four mistakes worth knowing before you start.
- Skipping the permit or final inspection. In Metro Vancouver, unpermitted railings can create real problems at resale and may not be covered by your home insurance if something goes wrong.
- Not plumbing posts before fastening. A post that is even slightly out of plumb throws off every component attached to it — rails, balusters, and cap included.
- Using non-galvanized hardware. Standard screws and bolts corrode quickly when they contact pressure-treated lumber. Always use hardware rated for treated wood.
- Misjudging baluster spacing on the angle. Spacing that looks correct on paper can produce gaps wider than 4 inches once installed on an angled rail. Always verify with a physical spacer block as you go.
Getting these details right from the start saves time, money, and the frustration of having to redo work that was almost finished.
When to Call a Professional Deck Builder
Building a deck stair railing is a manageable DIY project for many homeowners, but there are situations where calling a professional is the smarter move. If your deck is elevated more than one story, if the stair configuration involves complex angles or multiple landings, or if you are unsure about the structural connection between the posts and stringers, a licensed contractor will get it done safely and to code without the guesswork. A professional also handles the permit process and final inspection, which removes a layer of stress from the project entirely.
When looking for a deck builder in the Vancouver area, look for someone with local experience, proper licensing, and a clear understanding of BC Building Code requirements. At Deck Contractors Vancouver, we build and repair decks and stair railings across Metro Vancouver and the surrounding communities. If you are not confident about any part of the build — or simply want it done right the first time — we are happy to take a look at your project and walk you through your options.